As I want to keep this modular furniture proposal open-source and reapplicable by everyone, I am working on the instructions by looking for a way of production that can be done by most people.
I took advantage of my time at Waag Fablab Amsterdam to explore the possibilities of merging this project to digital fabrication.
The idea is also to produce more parts to explore the limits of the project and make it evolve into a more complete system.
In 2014, I made the parts of my system with a dremel and other basic tools (drill, screwdriver, sander, etc). It was not perfectly precise but it was working well enough for a prototype.
Today, I want to see if it's easier and more precise to make it with the CNC milling machine because it's here in the fablab and on that way my project could be done by everyone who has access to a CNC milling machine.
First trouble
I still haven't found yet in Amsterdam the right wood pieces with the exactly right measurements to fit with the OS grid.
Round part (vertical part) : ⌀20mm
Half round part (horizontal part) : 40mm
So I came to the wood shop and bought pieces a bit more bigger to do first experiments.
Round part (vertical part) : ⌀22mm
Half round part (horizontal part) : 43mm
I decided to first try to adjust them with the CNC milling machine in order to let them fit with the OS Grid. It was really not easy because we speak about 2mm and it's very difficult to be so much precise by modifying existing pieces with the very big CNC milling machine we have here at the Fablab.
Make a Clamp
I first designed clamp to fix the pieces to the bed of the CNC milling machine.
Here are the settings I used in vCarve to generate de g-code:
Tool
5mm flat end 2 flutes mill
Pass Depth
2.0 mm
Stepover
2.0 mm - (40%)
Spindle Speed
1800 r.p.m
Feed Rate
60.0 mm/sec
Plunge Rate
20,0 mm/sec
I used the same setting for the Roughting Toopath (Along Y) and the finishing Finishing Toopath (Along X).
Adjust pieces
I used the same settings as before to adjust the vertical round part and the horizontal half round part.
The first try with the ⌀22mm vertical round part was a fail, the diameter of the piece is now bigger on the top and smaller on the end and the only reason I see is because it was not completely flat. I also had a problem with my settings, the mill didn't go on both sides of the round part. But I figured out this problem, I have to add a margin around the model and then the machine accept to go on the sides.
The second try with the horizontal half round piece worked well, but working with the CNC milling machine to do this is too long... 50 minutes to remove 3 mm thick by 800 mm long! And I have to do this two times because there is two parts for this component. I certainly could have saved time by doing only the Finishing toolpath and skipping the Roughing Toolpath.
Make the notches and slots
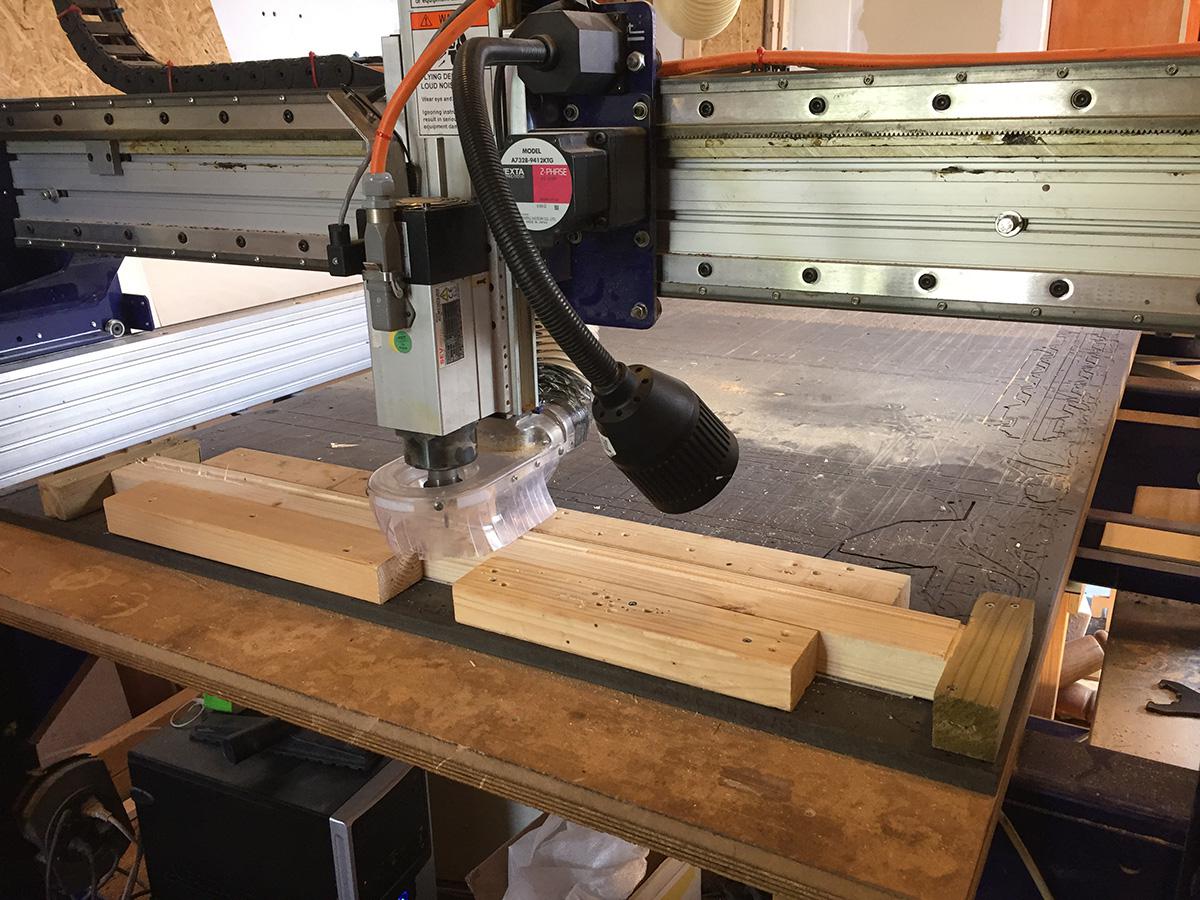
I started with the half horizontal round part. The first step was to install the set up with the clamps, and make sure that it was as flat as possible and as parallel with the machine as possible.
Again 50 minutes to make two notches... I have the feeling that the g-code could be smarter and do this faster by saving some useless movements. But how?
Use faster settings? But it is not really allowed here because everybody is scared about this big CNC milling machine and I have no experience to try new settings.
Try to make a smarter g-code ? I should try to use Fusion360, because it's a CAD (computer-aided designing) and CAM (computer-aided manufacturing) software. So you can set a lot of parameters and they have good previews.
I thought I had a second perfect plan to make the pieces of my modular furniture system with the CNC milling machine. It should really work according to me but my first try failed..
The main differences with the previous try are I only used 2D jobs, which is faster, and a sacrificed sheet as a completely flat and aligned support.
NB : I finally found the wood's stick with the right dimensions on OPITEC website:
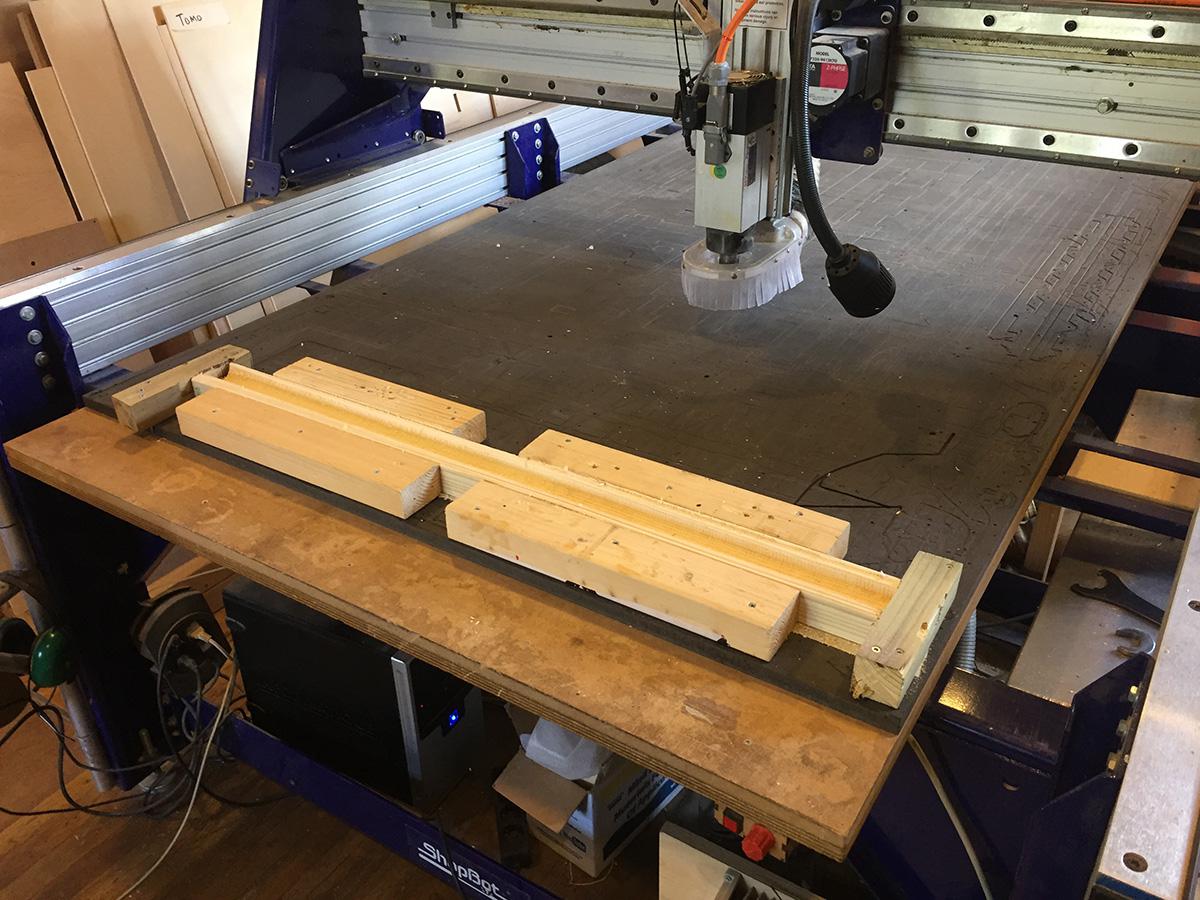
This step is made to be sure that the wood sticks will be completely flat and aligned with the CNC milling machine.
I needed a panel of wood as a sacrificed sheet, I used a MDF panel of 600x1220mm.
I first did a facing of the panel of MDF to make the support completely leveled withs the CNC milling machine. I used a big mill especially used for facing and I made a square on my panel by removing ~3mm.
Second, I drew straight lines of 1000mm by removing 3mm with a mill of 6mm (flat end 2 flutes) as a guide to put the wood sticks and be sure the wood sticks will be completely parallel with the CNC milling machine.
Then, the idea is to start with the wood stick of ⌀40mm with those 3 steps :
Make the notches : two holes of ⌀20mm at 40mm of the extremities.
It will be the holes to insert the vertical parts.
Cut the round stick in two half parts.
Turn the half parts in 45° and make the slots inside the notches.
The slots will receive the rings to lock the system.
I first drew each steps in a .dwg files, then I configured the different steps in vCarve. It's important to work like that because on that way, every jobs (or every layers) are superposed and aligned.
I put the ⌀40mm wood stick on the line I made before on the sacrificed sheet of MDF. Then I knew the wood stick is completely leveled and aligned with the CNC milling machine.
I screwed the extremities of the wood stick to the sacrifice sheet to attach it. So I sacrificed the ends of my wood stick (see in yellow) but with that solution, I didn't need to make extra clamp.
I also attached some pieces of wood on each sides of the wood stick to avoid vibration during the jobs.
Then I was ready to start the first job :
Make the notches
I used those setting :
PS : make sure your mill is long enough to go trough the ⌀40mm wood stick.
Tool
6mm flat end 2 flutes mill
Pass Depth
2.0 mm
Stepover
2.0 mm - (40%)
Spindle Speed
1800 r.p.m
Feed Rate
30.0 mm/sec
Plunge Rate
20,0 mm/sec
I first made two pockets of ⌀20mm at 40mm of the extremities of the final dimension of my wood. (Remember, I sacrificed the ends of the wood stick to put screws on it, to attach it (see in yellow). Then I needed to be extremely careful and keep a safe distance to run my jobs)
The pockets are exactly in the middle of the width of the wood stick thanks to the line I made before on the sacrificed sheet of MDF and to this method to work with superposed layers to generate the jobs.
But as you can see on this picture I had a problem with the next step, the cutting step. The mill touched the screw because I didn't keep a safe distance between the screw and my job.... it was very dangerous because then the little hot metal pieces of the screw went directly on the dust extraction with all the wood dust collected ! Luckily, there was no fire but I had to wait the day after to continue my work. (and more over, I broke the mill)
Cut the round stick in two equal parts
I re did my job of the day before by keeping a safe distance from the screws. It worked but it was not in the middle of the stick.
I figured out the problem : I didn't select the good setting when I made my g-code in vCarve. I had to go on the line and not outside.
Make the slots inside the notches
For this job, I had to change the mill for a smaller one to fit with the rings, and I used those settings :
Tool
3mm flat end 2 flutes mill
Pass Depth
2.0 mm
Stepover
1.2 mm - (40%)
Spindle Speed
1400 r.p.m
Feed Rate
40.0 mm/sec
Plunge Rate
20,0 mm/sec
I had the same problem with the slots than before with the cutting part, I was not on the line but outside. And I don't know why, but the second holes seems to not be in the center.
I wanted to run for a second time those three last steps to correct my mistakes.
I started again with the ⌀20mm notches but I used an other line on the sacrificed sheet to test.
Then, the notches was really not in the center of the stick.. I guess is again the same mistakes with the line setting. Then I decided it was too much for this test and I gave up for a bit..
I finally decide to go on a woodworking space to work with more traditional machines like column drilling machine, format saw and other circular saw on table.
I went to a place in Amsterdam called Openbare WerkPlaats in order to rent workbench, tools and machinery for 2 days.
Horizontal parts
I first had to make a guide at Fablab with the CNC milling machine to make possible the modifications of the rounded sticks of wood.
Make a guide
The guide is for the ⌀40mm rounded sticks of wood in order to keep it in the same position for all the further steps. I bought a lumber cut in two parts in the wood shop, and I did the rounded shape with the CNC milling machine.
You can download the .stl file of the half part of my guide and make it two times with the CNC.
Here are the settings I used in vCarve:
Tool
5mm flat end 2 flutes mill
Pass Depth
2.0 mm
Stepover
2.0 mm - (40%)
Spindle Speed
1800 r.p.m
Feed Rate
60.0 mm/sec
Plunge Rate
20,0 mm/sec
I used the same setting for the Roughting Toopath (Along Y) and the finishing Finishing Toopath (Along X) and it took around 3 hours per piece(!!)
Make the Notches
Once arrived at OWP, I put the stick of wood in the guide, close the guide with wood clamps and use the column drilling machine to make two notches of ⌀20mm at 40mm of the extremities.
(NB : ⌀20mm is the size of the vertical parts)
Cut the stick in two equal parts
I kept the stick of wood in the guide and used the circular saw on a table to cut the rounded stick in two equal parts. The saw had a tickness of 4mm.
Make the Slots
Then, I opened the guide, took the two half rounded sticks of wood and made slots in the middle of the notches at the two extremities of the half wood stick with the format saw. The slots have to be at 2mm depth at the deeper point inside the notches. Because we lost 4mm by cutting the piece in two, the deeper point inside the notches is at -8mm. Then we have to make the slots at 10mm depth.
Vertical parts
I just use the format saw to make slots all around the rounded wood stick each 12 cm with a circular saw of 3mm and made slots of 2mm depth.
Result
PS : I finally decided to add two little holes on the two sides of the notches on each extremities of the half rounded horizontal parts in order to have the possibilities to add extra pieces and also to use bolds and nuts as a possibility to close the system.
Here is the home-made column drilling machine we have in the Fablab